We’re commonly asked, “Does bike geometry affect power output?” Or more specific questions like, “Does my saddle position affect my power output?” To get to the truth of the matter, we interviewed an expert.
Overview
Brian Gordon is a kinesiologist, certified Body Geometry Fit Specialist and Mountain Bike Product Developer for Specialized. Over the past few years, he has used scientific methods to fit hundreds of riders for maximal power, endurance and comfort and encountered nearly every bike-fit scenario you could imagine.
After our conversation, we discovered that the simple answer to the above questions is “no.”But it’s a little more complicated than that. From Brian we learned a solid principle you can use to make sure your bike’s geometry is not affecting your power output. Here’s that simple principle explained.
The First Step is a Proper Bike Fit
Before tackling the problem of bike geometry affecting your power output, you need to make sure you’ve eliminated the variable of a poor bike fit. There is no set formula that uses torso length, reach and inseam to prescribe a perfect fit. Since the body is in motion, and each person’s body moves uniquely, bike fitting is an art as much as it is a science.
While cycling is inherently uncomfortable to some degree, especially for new riders, excess or recurring pain while riding is generally an indication of a poor bike fit. It’s best to get the problem resolved as soon as you can.
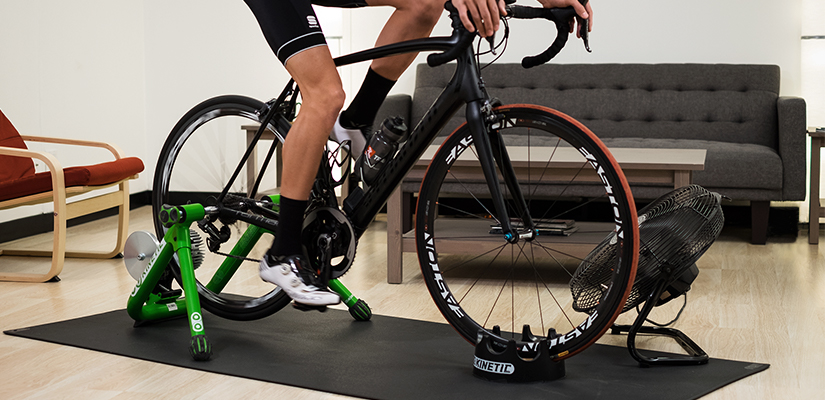
When it comes to getting a bike fit, there are plenty of options out there. Select Specialized dealers will have a Body Geometry Fit Specialist like Brian on staff that will take a holistic approach to making sure your position is optimized. If this isn’t an option for you, ask your local shop to see what they provide in terms of bike fitting — and go having done your homework. Remember that bike fitting is not an exact science, so getting it right may take some trial and error.
Adapt Your Fit to The Bike
Once you have a proper bike fit, you will have certain measurements t you can use when setting up a new bike. In most cases, these measurements will include the distance between three main contact points: your pedals, saddle and handlebars.
Let’s assume you were fitted on a road bike, but now you’ve got a new TT bike you need to dial in. The measurements you have can serve as a good starting point, but often riders find that their familiar position is suddenly uncomfortable on their new TT bike. The reason? The geometry of your bike.
TT bikes have aerodynamic shapes themselves, but they are also meant to make you as aerodynamic as possible on the bike. As a result, they have a very aggressive geometry. This means that the angles of the frame are intended to position your body far forward and low on the bike.
The appeal of positioning your bars super low in order to get your upper body as low as possible is where most riders step wrong. When your bars are the axis, or governing factor of their bike fit, a cascade of adjustments follow causing problems.
Because your bars are low, you generally find your hip angle very closed off. A practical explanation of this is that your knees get much closer to your chest than when you are on your road bike. This sharp bend in your hips reduces power output and puts a lot of strain on joints in your body.
The natural reaction to this is to move your saddle further forward so that your hips don’t have to close so far when pedaling. While you may feel you have resolved the problem, you’ve caused a problem you cannot fix. Your hips are too far in front of your feet, and you can’t move your cranks to compensate for that. Whoops!
We learned from Brian that the solution to this problem is to establish your crankset, or more specifically the center of your bottom bracket, as the axis of your bike fit. It is a constant you can use as a reference for all other adjustments to your saddle and handlebars.
Using the same scenario of your new TT bike, the end result would most likely see you with handlebars high enough to allow you an open hip angle when pedaling, and a saddle position that puts your knee over the ball of your foot at the front of the pedal stroke.
With the center of your bottom bracket as the axis of your bike fit, you’re able to more easily find your ideal position on a variety of bikes with different geometry. Gravel bikes, cyclocross bikes and mountain bikes have “slack” geometry (backward leaning) and move your body in the opposite direction of TT bikes —backward. Be that as it may, the same principle applies. If you rotate your bike fit backward, using the bottom bracket as the axis of your bike fit, you’ll ideally find an equally efficient position.
Bike Geometry and Power Output Caveats
While your power output should not be limited by a bike’s geometry, you may notice a difference from bike to bike. There are plenty of reasons for this that, in an ideal situation can be overcome.
While the approach of using your bottom bracket as the rotational axis of your bike fit will work for most bikes, there are outliers. Certain bikes with extreme enough geometry may make it impossible to position your saddle or handlebars appropriately. The most common scenario for this is a downhill-oriented mountain bike that simply won’t let you get your seat far enough forward. If that’s the case, you hopefully don’t want to do anything but go downhill on that bike anyway!
While it is rare to see a bike that won’t let you get your saddle far back enough, it is possible and more common when a rider is on a frame that is too big for them.
Another thing to keep in mind with drastic changes in geometry is the fact that you may have to retrain muscles and muscle groups to engage in different ways while pedaling. A TT bike will put increased strain on your neck and shoulders while an enduro-oriented mountain bike may require greater core engagement to maintain stability when placed far backward on the bike. Give yourself time to get used to your bike fit in every case.
Having said all of this, there is a psychological component that comes into play for many riders. If you are using the “wrong tool for the job” like a TT bike on a mountain pass, that can put a mental limiter on your performance. Many riders simply struggle to perform equally in all scenarios.
A big thanks to Brian Gordon from Specialized for providing some great insight on this topic!
Listen to Certified Cycling Coaches Discuss Bike Fit and More
“Does Bike Fit Affect Power Output” is one topic we covered in last week’s episode of the Ask a Cycling Coach podcast. Listen to the episode’s full recording below to hear this and other questions from cyclists get answered by our certified cycling coaches.
Additional Notes
TrainerRoad’s Ask a Cycling Coach podcast is dedicated to making you a faster cyclist. It gives you the chance to get answers to your cycling and triathlon training questions from USAC certified coaches Chad Timmerman, Jonathan Lee and special guests. Learn more about other topics we covered in the latest episode with our resources below:
- How to adjust your training after a severe injury or illness
- How to balance your training between low and high intensities
- How to use resting heart rate to understand your performance
- How to shorten a training plan
- How to use rollers and TrainerRoad
- Are rollers better than trainers?
- How to base train for mountain biking
- How to use indoor training for mountain biking
- Is distance important for indoor training?
- How to adjust a training plan for a busy schedule
- How to use TrainerRoad to train for triathlon
- High intensity training for endurance athletes
- Why is my indoor FTP different than my outdoor FTP?
- How to plan a training camp
- How to build a pacing plan for a race
If you have a question that you’d like to ask Coach Chad, submit your question here. We’ll do our best to answer them on the next episode of the Ask a Cycling Coach podcast.