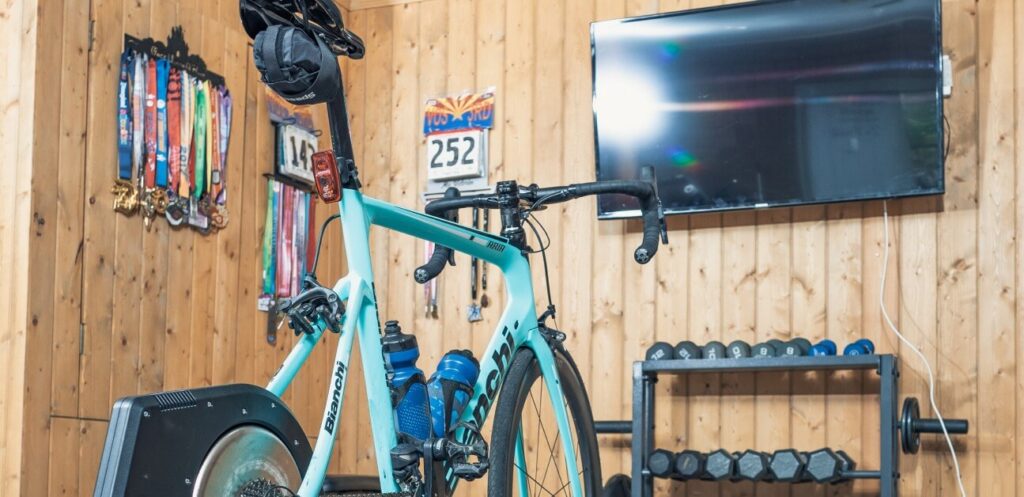
While a dropper post may seem unconventional on a cyclocross bike, there are real advantages out on the course.
Dropping your saddle away from your body allows you to navigate tricky terrain, including barriers, with greater ease. While this increased ability will come with a weight penalty, dropper posts are getting lighter every year and the weight penalty could be justified depending on the terrain you regularly ride.
If you are riding technical terrain that causes your bike to seem like a limiter, or if you’re just curious about how this install works, read on.
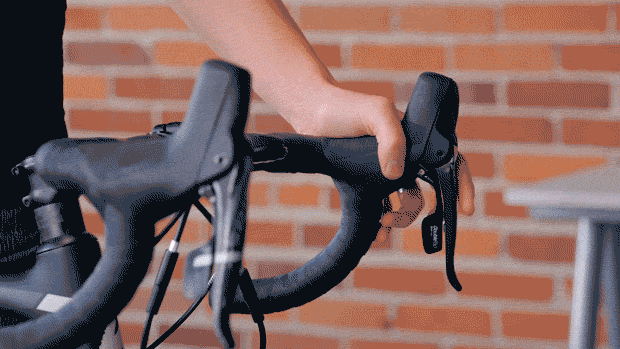
Drop Bar Shifter for Remote
Dropper posts come with flat bar remotes, but most cyclocross bikes have drop bars. If your dropper post remote isn’t easily actuated while on your hoods or drops, then it will hardly be beneficial.
Another key component to having a dropper post on a cyclocross bike is a 1x drivetrain (just one chainring up front). Not only will it make this install possible, but it will also go a long way toward simplifying your equipment.
Having no front derailleur means your front shift paddle isn’t connected to anything, freeing it up to act as our dropper post remote. All it takes is a simple modification.
SRAM Shifter
While this will void your shifter’s warranty, the only modification you’ll be making to the shifter is removing the shifter ratchet mechanism. In this case, we’re using a SRAM Force Hydro shifter.
Modification
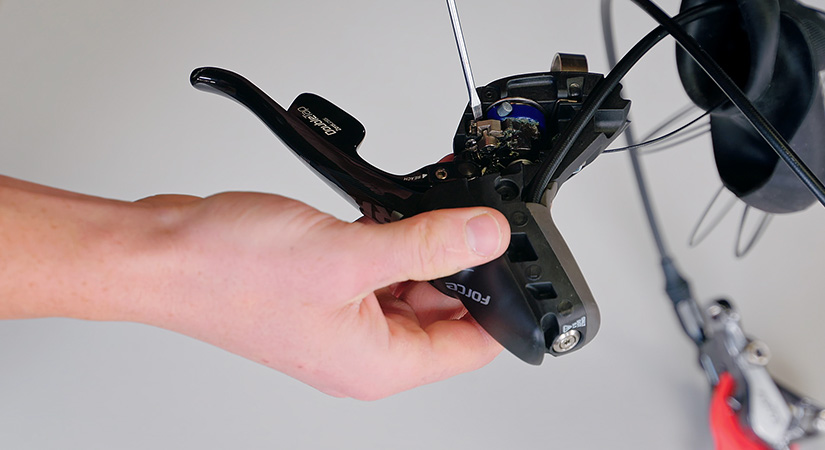
Step 1: Remove shifter hood
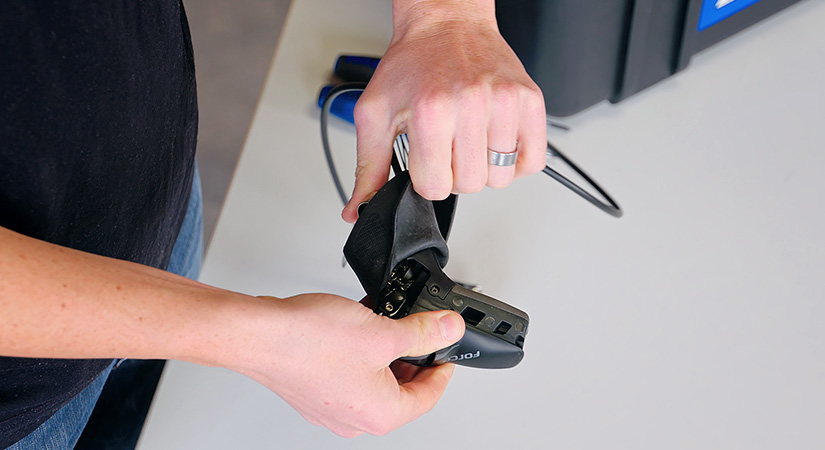
The shifter ratchet mechanism is located behind the rubber hood and a small plate on the outside of the shifter. In order to get to it you’ll first need to remove the hood.
Step 2: Remove plastic cover
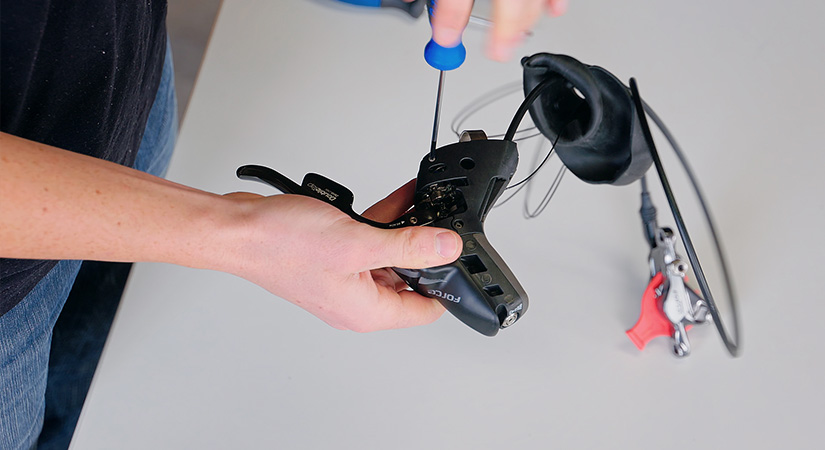
Once you’ve removed the hood, use a small phillips head screwdriver to remove the three screws that secure the plastic cover.
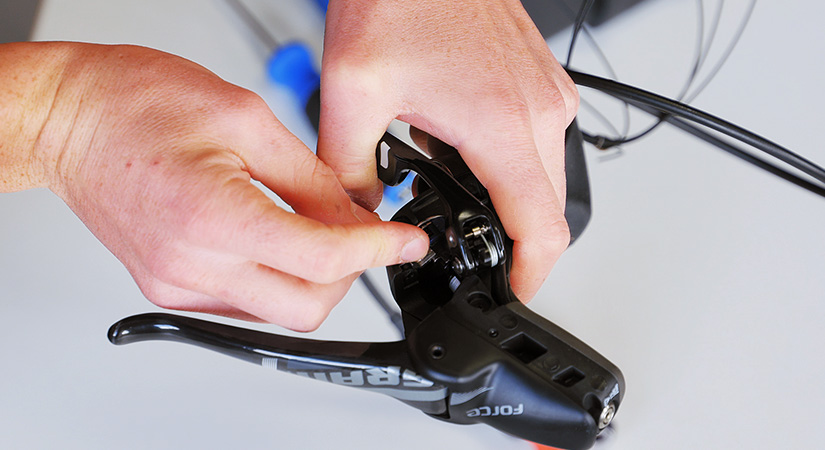
Step 3: Locate shifter ratchet mechanism
After removing the plastic cover you can locate the shifter ratchet mechanism just below the main mechanism of the shifter.
Step 4: Remove circlip
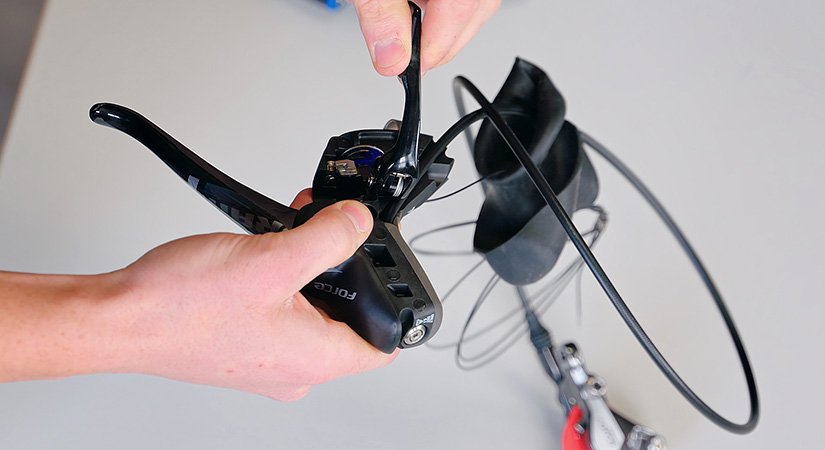
In order to remove the shifter ratchet mechanism you’ll need a flathead screwdriver to remove a circlip and a very small phillips head screwdriver or allen key to push a pin out of the shifter. For easier access to the circlip, I recommend moving the shift paddle inward and holding it up and out of the way.
You should now be able to easily see the shifter ratchet mechanism. There’s a pin that runs through the body and the circlip you need to remove is holding that pin in place. To remove the circlip use a small flathead screwdriver and carefully push the open end of the circlip until it pops out.
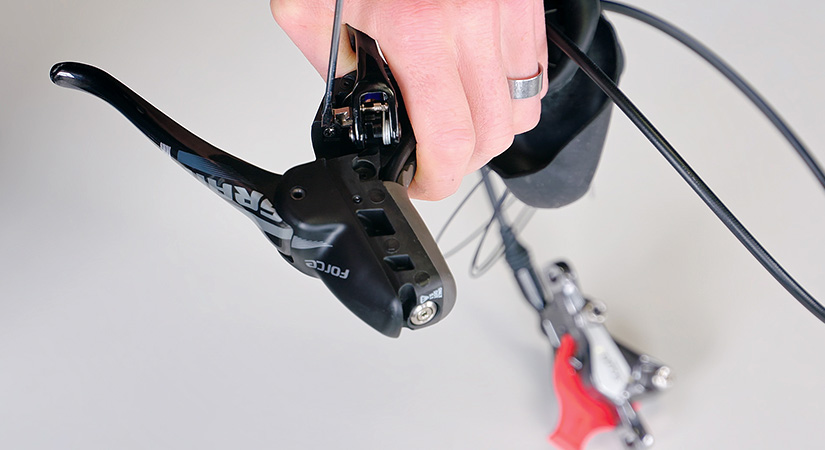
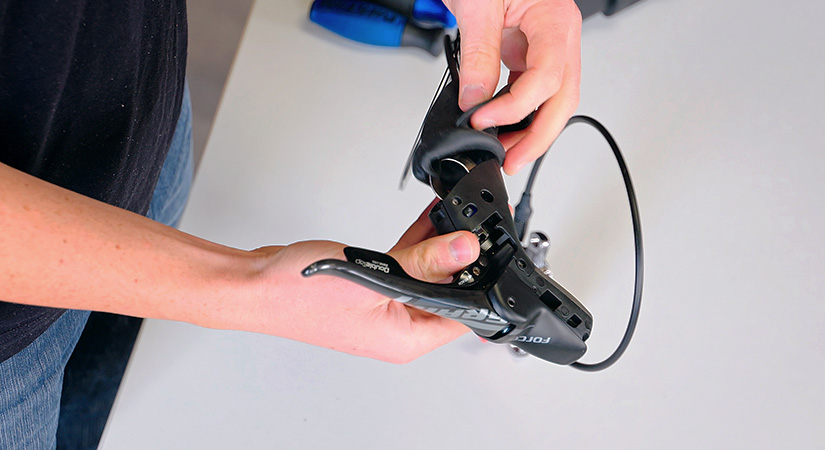
Step 5: Remove pin
With the circlip out of the way you can push the pin out toward the back of the shifter with a small phillips head screwdriver or allen key.
Carefully pull the pin out of the shifter body while keeping a finger over the shifter ratchet mechanism to make sure the spring and other small parts don’t get lost.
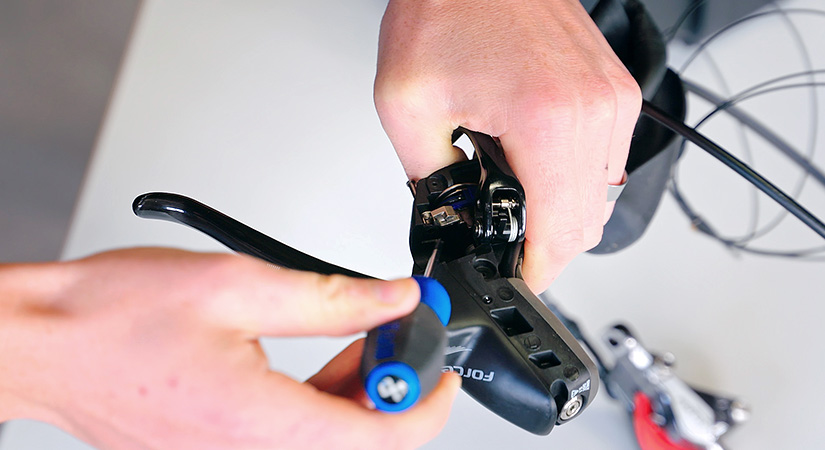
Step 6: Remove shifter ratchet mechanism
Once you’ve removed the pin, you can carefully remove the shifter ratchet mechanism.
Step 7: Replace plastic cover / rubber hood
The shifter ratchet mechanism is now removed. Simply replace the plastic cover and rubber hood.
Conclusion
Your shifter is now modified and ready to be connected to your dropper post. While this modification may go against tradition, installing a dropper post is one change you can make to your equipment that can potentially make you faster on race day.
Are you training for your cyclocross season? Get started on a TrainerRoad cyclocross training plan.
Share this Post
Jonathan, Cool and well done post. Can the shifter ratchet mechanism be as easily removed/disabled for Shimano shifters?
Thanks, Alan. We’ve seen it done on Shimano shifters, but haven’t done it ourselves with them. I’d refer to the Shimano manuals/schematics to visualize the components before giving it a try. 🙂
That is pretty clever. Is that for cable operated dropper posts and you are just removing the ratchet part?
If you had a completely hydraulic brake/shifter, e.g. Rotor Uno, and a hydraulic dropper post would you need to adjust it much at all? I don’t know if the volumes of oil to move are very different?
I guess the electronic ones are pretty easy to hide anyway.
Ok, so I have gone ahead and tried this on my Fuji Altamira CX. It works, but there are some issues with cable routing. I have had to modify the removable cable stop at the top of the down tube to allow for housing to be routed down the downtube and then up the seattube. My issue is that in order to fit the seatpost, I have to insert it almost all of the way down into my bike’s seattube. This causes the 1′ of housing to kink and twist inside the frame eventually causing the excess housing to pop out where it enters the frame at the top of the downtube. Now I have a whole bunch of cable housing sticking out of the front of my bike in order for this to work. Was routing the cable housing or the excess when inserting the internal dropper an issue for you? If so, how did you solve it? Thanks!
I agree Joseph, can’t work out how to get the cable tension right with internal routing? for an MTB, you install the post, then set the cable tension at the lever. But this isn’t possible with a road lever, since you have the “stopper” at the end of the cable which needs to slot into the lever. Meaning you have to set the tension at the seatpost – but you can’t as you need it installed – unless you make the outer excessively long!? Is this correct?
The main points for installing a dropper post is making sure that it s highest saddle point matches up with that of your old seatpost.
Hi Jonathan and TRd team!
Can you please tell me which dropper post you’re using and what is its diameter?
Looking at Specialized Crux frame geometry it appears to be 27.2mm, is that correct?
Thanks
Tony
It’s the KS Lev Integra 272, which can be found right here: http://kssuspension.com/product/lev-integra-272/
Hope this helps!
Thanks Tony!
Can you tell me what left lever you’re using? Is it a HRD hydro lever?
Thanks!
LOL i’m sorry, i just found the shifter in the article.
Thanks!
No sweat Michael! Glad you found it.
Happy Training!
Was this done with a hydraulic reverb dropper, or cable actuated mechanical post?
Just bought a Force 1X CX bike, but love the clean lines of the system, so will be selling of one Force 1 lever and buying a Force 11 one to do this!
This is brilliant, considered a short travel dropper for my GT Grade, would this be roughly the same for a Shimano 105 shifter or are the internals noticeably different?
We personally do not have any experience with modifying the Shimano Lever, and there is a good chance that their construction is quite different. I would highly recommend doing thorough research before you bust open your Shimano Lever because the internals can be extremely tough to put back together.
Good luck!
Would this work with a sram Apex left lever?
This should work with any Sram Double-Tap left shift levers. The internals are the same throughout the product line, the materials just change.
Good luck!
This dropper in the video appears to be internally routed? How is the cabling routed around the bottom bracket area into the seat tube?
In monocoque carbon frames, the tubes are not continuous between the junctions. Near the junctions, they carbon curves to form the next tube, leaving room for the cables to pass through. To get everything set up, you will typically need to remove the bottom bracket, but once the housing is routed you can replace the BB and push the cables out of the way.