Cycling Group Rides: A Guide to Etiquette, Pacelines, Drafting, and Safety
Whether you’re competing in a race or simply enjoying the fresh air with your friends, group riding is one of the great joys of cycling. Drafting in a group lets you go much faster than you would on your own, and the camaraderie of others is a powerful motivation to push your limits. If you understand the crucial skills, techniques, and etiquette of group cycling, you can be a faster, more efficient, and safer cyclist on your next group ride.
What is a Group Ride?
Broadly speaking, a group ride is any situation in which multiple cyclists cooperatively ride together. This encompasses everything from high-intensity races to relaxed coffee shop rides, and everything in between.
The crux of a group ride is drafting– while one rider leads the pack and rides into the wind, other riders sit in their wake with drag reduced by up to 50%. By taking turns pedaling at the front and sitting behind one another, a group of cyclists can collectively save an enormous amount of energy. It’s the same method migrating geese use when flying in formation, and since overcoming air resistance accounts for the vast majority of a cyclist’s energy (up to 95% at high speeds) it’s an incredibly effective and efficient way to ride.
With the obvious advantage of riding in a group comes risk, too. It’s hard to see approaching obstacles while tucked into the pack, and any mistakes or crashes at the front of the group can create a hazard for riders further back. For this reason, safe group rides require a basic understanding of etiquette and skills.
Cycling Group Ride Types
Group rides can be divided into two main categories.
In a no-drop ride, the group stops periodically to allow any riders falling behind to catch up and no rider is left behind. The group’s pace between regrouping points can range from easy and conversational to quite fast, and is determined beforehand so all participants know the plan. No-drop rides are fantastic for beginners to hone their skills, and for more experienced riders they can be a low-stress opportunity to build fitness and spend time riding with others. A famous version of this is the coffee shop ride, in which a cafe stop is included mid-ride.
Drop rides are faster and less forgiving rides in which riders who can’t hold the pace are left behind to fend for themselves (known as getting dropped). Like no-drop rides, drop rides tend to have a predetermined format. This can simply be a sustained fast pace or it may be a mock race with defined sprint points and finish lines. In many areas, these competitive rides are somewhat ironically known as “world championships.”
Whether drop or no-drop, most group rides begin at a predetermined meeting point at a specific time and follow a route known in advance to all participants. Some large group rides break into several groups of different speeds to allow all riders the chance to partake. Many longer group rides also include store or water stops, which may be planned in advance or simply decided by consensus during the ride.
Basic Cycling Group Ride Skills and Etiquette
Group rides around the world have widely varying traditions and procedures. But no matter their size or pace, all share some common techniques and etiquette.
Pacelines and Drafting
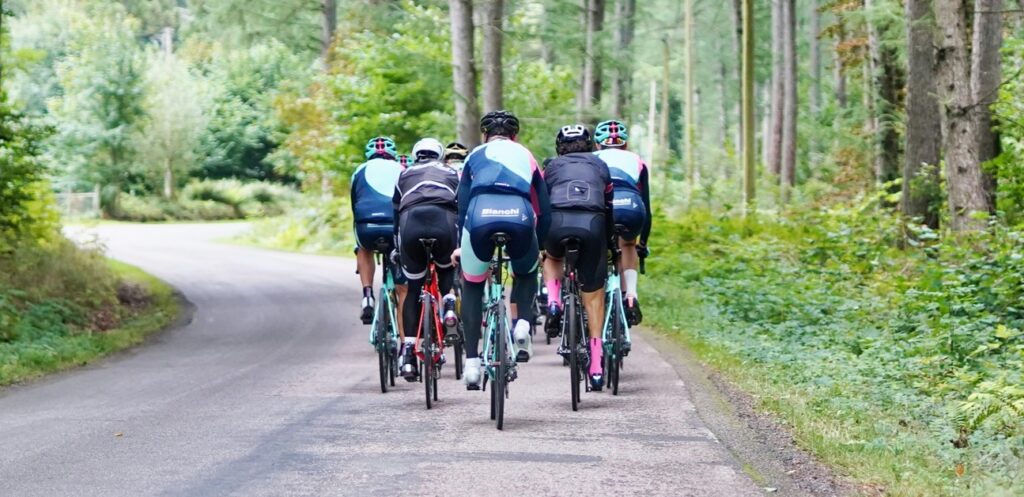
The basic element of the group ride is the paceline, in which the rider at the front breaks the wind and a trailing column of riders sit in their draft. Pacelines on open roads tend to be single or double-file. In races on closed roads, a larger and less-organized group called a peloton is common.
Riding at the front of the paceline is called pulling. Typically, you pull for a period of time ranging from a few seconds to several minutes, before the next rider in the paceline moves to the front and does their share of the work. After completing a pull, you move to the side and drift back alongside the paceline, eventually reentering the draft behind the last rider in the group.
Very fast rides may utilize a unique format called a rotating paceline, also referred to as “through-and-off” in some parts of the world. In a rotating paceline, you peel off the front of the pack almost as soon as you reach it, quickly returning to the back to continue the cycle. This creates a constant “rotation” in which riders are drafting each other both while moving up towards the front and while moving back towards the rear of the pack. This format is challenging and demands careful pacing throughout the rotation, but is an extremely effective way for expert riders to sustain a high pace.
Paceline dos and don’ts
- Do: ride smoothly and predictably
- Don’t: swerve, surge, or brake suddenly.
- Do: ride only as close to the wheel in front of you as you feel comfortable and safe doing
- Don’t: overlap your wheel with the wheel ahead of you.
- Do: Stay attentive and keep your hands where you can access the brakes if needed.
- Don’t: use aerobars or positions that compromise control.
Pulling
When you move out of the draft and get to the front of the paceline, it’s your turn to do the work and take a pull. Pulling is more strenuous than sitting in the pack, especially at high speeds or into a headwind. However, it’s easy to overestimate how hard you need to work and inadvertently surge the group’s pace as a result. This is annoying to other riders and can wear everyone down prematurely, so keep things smooth and the entire group will benefit.
As the rider in front of you moves to the side, fight the urge to quickly “move up” into the front position. Instead, try to maintain speed by just slightly increasing your effort, and allow the rider who’s rotating off to drift back at their own pace. Once you’re on the front, keep things steady and avoid any sudden changes in pace. Resist the natural temptation to surge up climbs, instead keeping your effort constant but allowing speed to drop while going uphill. This helps the group stay together and makes for an overall smoother experience.
How long you should stay at the front depends partly on what the group is doing and partly on your ability. Generally, the faster the group, the shorter the pulls, but pay close attention to how you feel. You need to save enough energy to catch back onto the paceline after rotating off, as well as to pull again later on. Every group ride has its own standards, but there’s no shame in pulling for a shorter time than others if it’s what you need to do to hold the pace.
While at the front, you assume responsibility for picking a safe path for the group around any obstacles. Keep your eyes on the road and clearly signal any upcoming hazards. See the sections below on hand signals and verbal cues for more on this.
Peeling Off/ Rotating
Once you’re finished pulling, it’s time to rotate or “peel off” and return to the back of the group. In most group rides, this is initiated with a hand signal or elbow flick to alert the rider behind you that you intend to pull off. Next, smoothly pull to the side before easing up a bit, causing you to gradually drift back alongside the rest of the paceline.
As you peel off the front, avoid swinging too far away from the group. This can put you dangerously far into the trafficked lane of the road, and also moves you outside of the draft. By staying fairly close alongside the other riders, you can maintain some of the aerodynamic advantages of the pack and make it easier to catch back onto the back of the group. As you reach the last rider in the line, increase your pace slightly and move back into the draft as they pass by.
In a single-file paceline, riders most commonly peel off towards the inside of the road. In double-file pacelines, it’s most common for both pulling riders to peel off at the same time, with the rider on the left peeling left and the rider on the right moving right. These practices may differ due to local customs or wind direction, so it’s best to defer to the practice of the specific group you’re riding with. Always remember to check for traffic and road hazards as you peel off.
Note that it can take quite a bit of energy to get back onto the rear of the paceline after peeling off, especially if you drift back too quickly or if the next rider increases the pace. This little effort can easily put you over the limit if you’ve just taken a hard pull and is one of the most common times to get dropped. Whenever you’re pulling at the front of the ride, plan ahead and save something in your legs for the upcoming effort of catching back on.
Cornering and Descending in a Group
Riding in a paceline on straight, level terrain is comparatively simple. But turns and hills are a fact of life on any ride and can present a challenge for new riders.
In corners, the key is to follow the line and speed of the riders in front of you. Do any braking before the turn, then smoothly enter and follow a natural arc through it. Riders further back in the pack inevitably need to brake harder before the turn than the first riders to enter it, a phenomenon known as the accordion effect. For this reason, it’s helpful to shift into an easier gear before entering the turn, so you’ll be able to accelerate and get back up to speed more quickly afterward.
When the group encounters a descent, riders further back in the pack will naturally accelerate more quickly than those near the front, so it’s helpful for the leading rider to continue pedaling as long as they can. Otherwise, it’s best to simply play it safe on steep downhills. There’s no need to tightly draft, and it’s a better idea to let space open up between you and surrounding riders than to sit dangerously close to others at high speeds. As the group reaches the bottom of the descent, the paceline will naturally come back together with the momentum.
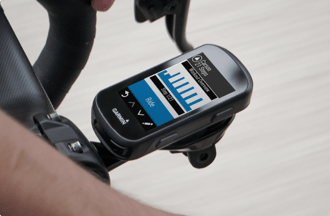
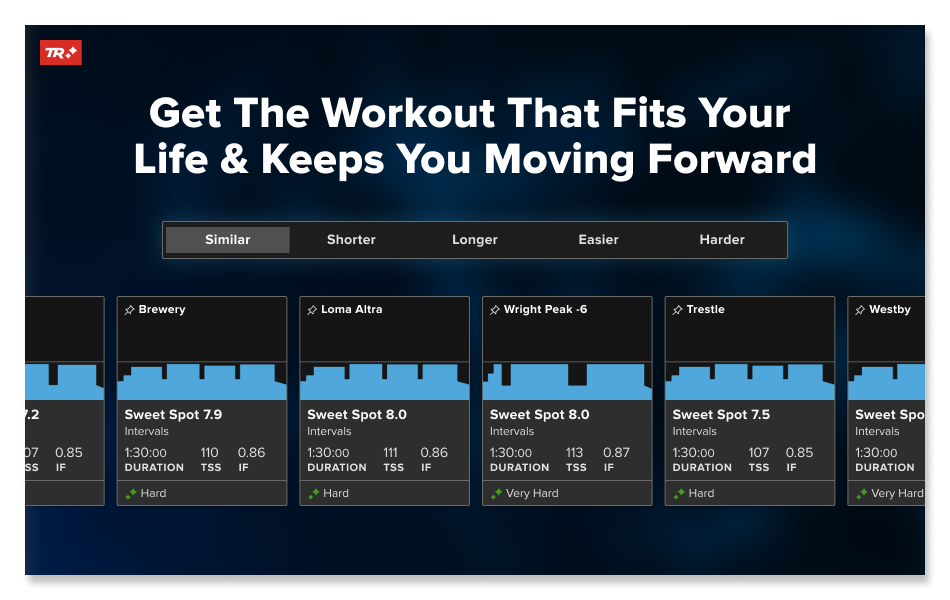
Outside Workouts
Take your training outdoors with TrainerRoad Outside Workouts on your Garmin or Wahoo device.
Check Out TrainerRoadSafety: Hand Signals
The further back you are in the paceline, the harder it is to see approaching hazards. For this reason, riders use hand signals to alert each other to upcoming obstacles. These signals can vary dramatically from region to region and even between different groups in the same area, but a few are almost universal.
Most common is pointing or gesturing with an open palm towards the relative location of an upcoming pothole or obstruction. For instance, if the group is approaching a pothole along the right edge of the pack, riders will point down and to their right. Simple points or extended arms are also used to indicate upcoming turns, both to other riders and to nearby vehicles.
Other widely-used gestures include a behind-the-back sweeping or waving movement, signaling the need to move over for a runner, parked car, or another slow-moving hazard. In some areas, riders use a “shrugging” motion of both elbows to indicate their intention to stand up or bunny hop a small obstacle. Some groups use a clenched fist or palm on the hip to indicate the intention to peel off the front, but most riders simply flick an elbow to indicate this. An open palm held behind the back indicates an impending stop sign or red light, and a one-handed patting or dribbling motion means the pace is slowing.
Finally, the universal signal for a mechanical problem is a raised hand. If you get a flat tire or other mechanical that does not allow you to continue, raise your hand to alert other riders you are incapacitated so they can safely navigate around you.
Safety: Verbal Cues
Verbal cues often accompany hand signals. In the English-speaking world, the most common are “Car up” (meaning an oncoming vehicle is approaching) and “Car back” to indicate a car coming from behind the group. “Car Right” or “Car Left” are used at intersections to indicate oncoming traffic from those directions. “Stopping” and “Slowing” let the group know about impending changes in pace, while “Hole!” is often used in conjunction with hand signals to draw attention to particularly dangerous potholes. Other verbal cues are self-explanatory and may be dependent on the situation, such as “Dog,” and “Gravel.” Finally, “Clear” is sometimes used to indicate an open intersection, but you should always visually double-check before rolling through.
In a group ride, hand signals and verbal cues are invaluable to keep every rider safe and aware. No matter where you are in the pack, if you see something hazardous, let the group know by gesturing and calling it out.
Advanced Group Riding Skills
Once you get the hang of riding in a group, you’ll naturally become more comfortable and efficient riding with others. Here are some more advanced skills that can help you step your game up to the next level.
Skipping Pulls
Group rides are effective because the hard work is distributed amongst everyone, and between efforts at the front you can recover in the paceline. But sometimes, you might find yourself in over your head, or you may just not have the legs to do the work. In these situations, self-preservation wins out, and you should consider skipping pulls.
The easiest way is to position yourself near the back of the paceline and allow a gap to open in front of you each time a rider peels off and drifts back. The other rider can then re-enter the paceline in front of you, while you maintain your position and never move up. Another method is to let yourself reach the front but pull off immediately, staying in the rotation but never doing any sustained work. Whichever method you employ, don’t be embarrassed or ashamed. Knowing your limitations and lasting for the entire ride is a bigger achievement than trying to work above your level and getting dropped.
Sag Climbing
Climbing in a group can be intimidating, because the pace may be higher than you’d choose on your own. Sag climbing is one tactic to let you climb a little more slowly, without getting dropped or left behind.
To sag climb, move to the front of the paceline just before the hill. Then, as you go up the incline, ease up a bit and allow other riders to gradually come around you. If you time it correctly, you’ll drift back in the pack over the same time it takes to reach the top, and arrive at the back of the group just as the pace picks back up. As a result, you’ll climb at a slower and more manageable pace than other riders, but you won’t be left behind without a wheel to draft as you reach the top of the hill.
Sag climbing can be risky, as the riders you plan to draft behind at the top of the climb may themselves be falling behind. It works best on relatively short hills in large groups.
Echelons and Crosswinds
Pacelines are an incredibly efficient way to ride in most situations, but in strong crosswinds, they can lose some of their advantageous effects. Echelons are a modified paceline format for this challenging scenario.
The concept of an echelon is simple- instead of sitting directly behind each other, riders sit at an angle from one another to shelter from an oncoming crosswind. In practice, it’s very hard to execute effectively, and can be dangerous or illegal to spread widely on an open road. Unless you’re a very experienced rider on a closed course, echelons are best left to the pros.
If your group does encounter a cross/ headwind, slightly staggering your position relative to the rider ahead of you at an angle away from the wind can offer a better draft than a standard paceline. However, there is a tendency to overlap wheels in this situation, and since sudden movements from side to side are common in a crosswind the danger is increased. Stay aware and alert.
Use extreme caution anytime a group ride encounters crosswinds. It’s always preferable to ride safely than to take risks in the name of efficiency.
Finding a Group Ride
So you’re ready to start riding in a group. How do you find one?
The simplest, most time-honored method is to ask at the local bike shop. Most areas have established group rides with designated meetups and well-defined routes, and the bike shop is typically the best place to find out. If your bike shop doesn’t know of any local rides, chances are they at least know someone who does and can point you in the right direction.
Social media is another good place to look. Check out the Facebook page or website of the local cycling club in your area, as these organizations often have a calendar of recurring rides and events. Many cycling clubs also have email lists or listservs you can join to learn of local events.
If all else fails, call up some friends and start your own group ride. Riding with trusted companions is the best way to get comfortable with paceline dynamics, and you’ll have control over the route and pace. As you get faster and more comfortable in the pack, reach out to other cyclists and invite them along. Your group ride might even become a new local tradition- especially if you include a coffee shop stop along the way.