If the Wiggle pics are accurate, seems the bottom has some spacers on there:
Well those might be small rubber feet. Just dont seam very tall and they are quite apart from each other and that may probably make in some uneven pavement part of the board to contact the floor. Have to wait and see it live. ![]()
Yep rubber feet. Not adjustable. As my garage floor isn’t completely flat, I used some thin cardboard under some of the feet.
@mcneese.chad just smashed it out the park. Great info ![]()
Man, Thanks so much Chad. Thats so much great info. Im going to try using the weight as a counter balance and see if that can get it more stable. Just did my first ride with it and after getting used to it it didnt feel too bad but still feels like theres room for improvement. Thanks again for all the suggestions and help!
You are more than welcome. Let me know if you have any questions not covered.
Happy rocking! ![]()
Hey Chad, When you put the weights on is it ok to just place them on the rocker or do you tie them down in the slots to attach the trainer? Do they fall off when it rocks?
I suggest attaching the counterweight with a strap or other method. You don’t want any chance of it slipping or getting bumped once you find the right spot for the weight.
I use a mat under my Lifeline rocker simply to catch any sweat splash and because I’ve a giant KICKR mat and what else am I going to do with it. My balls (ahem) are pumped to different pressures, arrived at via trial and error with a little hand pump. The one that comes with the rocker is fine, just experiment to dial it in. I’m going to try Chad’s counterweight option at some point. Good luck!
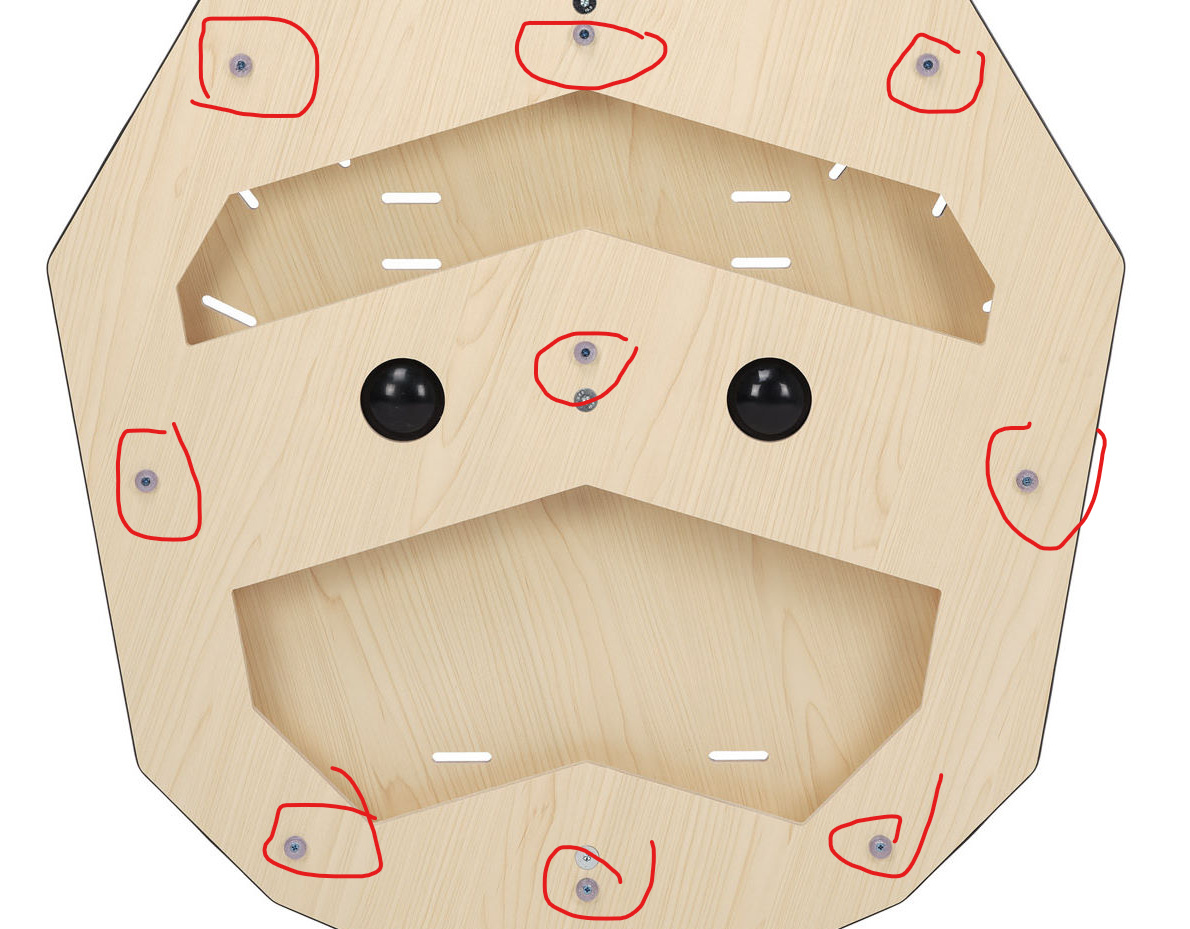
If anyone is looking to build one, here is everything I have compiled from Andrew’s design. It has for aft and side to side and I modified it a bit to fit my trainer.
Id expect to pay 200-400 for CNC for 1 piece from what I have seen in my research and then about $150 in parts depending on where you get them.
edit the spacing for the bearings need to 40mm not 35.
")
WeRideSouth Rocker Plate V2 modified.pdf (29.2 KB)
@mcneese.chad - have you any thoughts on the pros and cons of building a full length version of your Rocket Launcher? I’m considering attempting to build a version of your design and was wondering how feasible a full-length version would be rather than one that just sits under the trainer.
Yeah, totally possible to go full length with my design. I’ve not done it, but others have.
If I built one today, especially for full length, use the vibration mount design since it makes the build simple and easy compared to my hinge design.
Thanks Chad. Nice work!
Having had some more issues with the inflatable rubber bladders that came with my Bespoke Rocker, I’m considering switching to exercise balls. However I’m not quite sure what size I should be getting.
For reference, the space in between the top and bottom plate is about 2 - 2 1/4" when level. Just wondering what size of ball would work best in that space…
I have 2" between the plates on mine with a 6" ball either side, that seemed pretty common when I was setting mine up and has worked well.
Great, thanks! Will give that a try.
Cheap hack to determine what, if any, difference a rocker plate might make to my set-up.
Some background. I’ve got a Saris H1 (Hammer) and use the TR desktop app on my laptop (erg mode, powermatch and EPM enabled). I’ve developed a pretty smooth pedalling technique over time but I’ve got a slight biomechanical imbalance. I’m not sure if I’ve got one leg slightly longer than the other or a slight curvature of the spine which manifests itself as a leg imbalance. Out on the road this doesn’t seem to make much difference, due I suspect to the freedom the bike has to compensate for matters with its natural lateral movement. On the trainer, however, which is fixed, it’s a different matter. I always feel as if I’m not quite as efficient as I could be. Hence my interest in looking at a rocker plate.
Having spent the past few days reading through this thread, watching You Tube videos, and studying some of the many plans on @mcneese.chad’s Facebook group page, I decided to do a quick hack before going down the full DIY route.
All I used was some 13mm thick foam pipe insulator under each foot of the trainer, some small pieces of wood for additional support, and a screw-on leg borrowed from my Ikea desk for central support beneath the main body of the trainer. Fortunately, there’s a concave area under the Hammer that proved perfect for accommodating the Ikea leg. I had to experiment a few times with the amount of foam and the wood support under the right foot of the trainer to address the imbalance caused by the flywheel before I got it right.
I did a short test ride and wow! What a difference such a simple hack has made. My position on the bike feels much more natural, as does my pedalling. The trainer responded almost immediately to power changes (due to smoother and more efficient pedalling), and it felt so much easier to produce the required power and to stick to the power targets. I cannot believe how much difference such a simple hack has made.
Thanks to everyone who’s contributed to this thread for providing me with the information and inspiration to give this a try. Now for the full on DIY approach.


Since trying the above set-up, I’ve made the foam and wood more secure with velcro and gorilla tape, ready for this afternoon’s workout.
Here’s a short clip of it in action:

Awesome!!! Looks like a great.hack and so great thay you have such a positive experience right away. I appreciate the info and details of your experience. ![]()
Are you planning to just refine this setup or go further and do a full rocker?
Thanks Chad. Some great tips and advice on here and your Facebook group page.
I’ve just made the foam and wood supports more secure with some velcro and gorilla tape in readiness for this afternoon’s workout. I’ll see how things go and then make a decision. If it works fine as it is, why fix it, right? If not, I’ll start planning a full DIY job.


Plate is done. Finish is craptastic cos I did it with shellac at first but that’s not waterproof. More sanding and waning enthusiasm later just get it done and call it good.

Made to fit a direto and bosu balls I had lying around. Simplified to 3 planks since I don’t drive and needed to transport the plywood easily.